
 Português
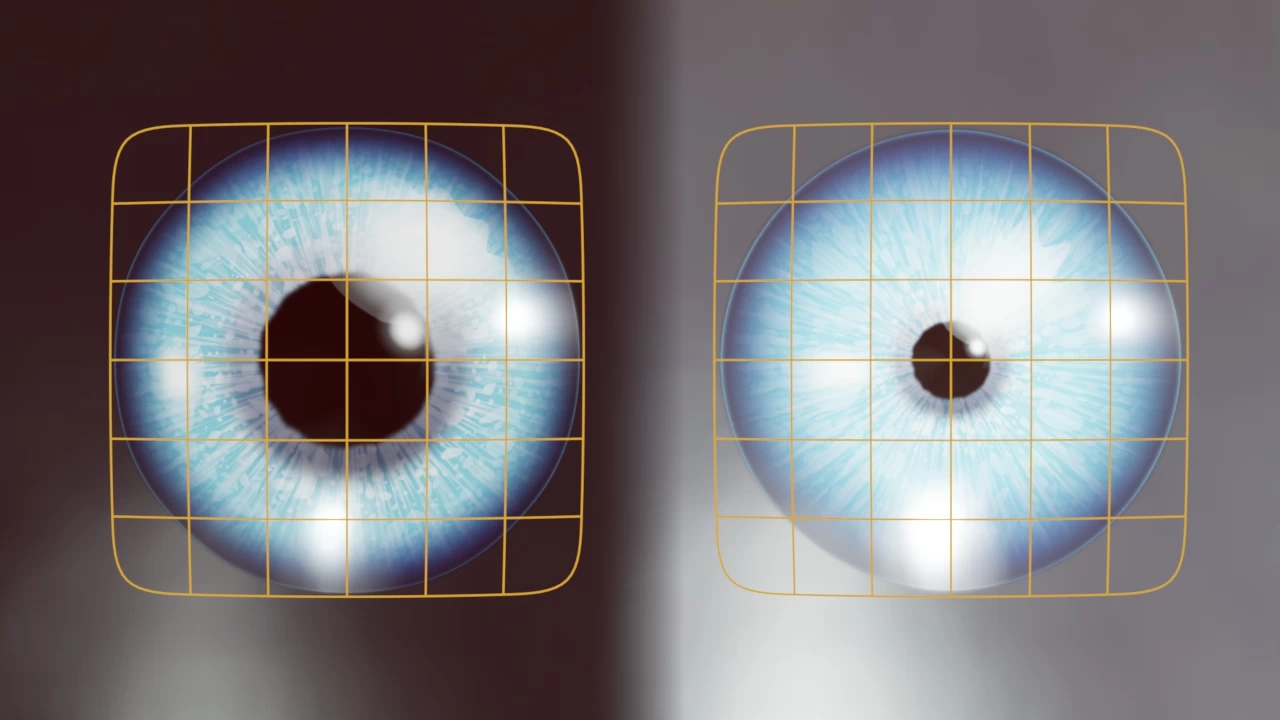
You probably have known some ways to animate a UV Map, either through modifiers like UV Warp, with shader nodes or even with add-ons.
In this guide, you’ll learn how to make a kind of “Shape Key” to UV Map, it means, make a shape tween and animate.
The formula we’ll have is very simple to animate a UV Map. This will work both in EEVEE and in Cycles.
This guide requires basic knowledge of Blender, textures, Shading Nodes and UV Maps.
Let’s pratice!
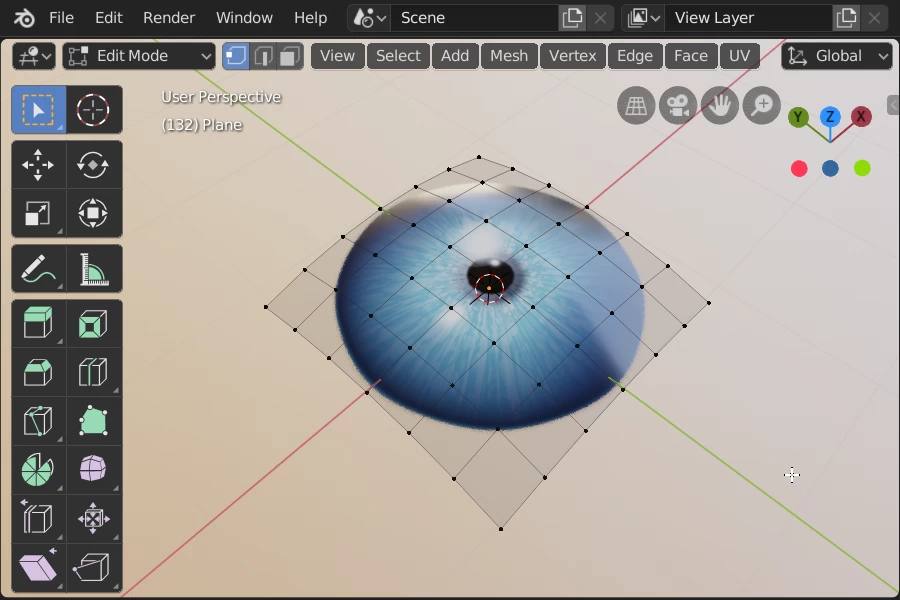
To begin, we’ll use a simple curved mesh, with a pupil’s subdivision and texture modifier. The mesh is already with UV Map applied.
You should already know that the eye pupil contracts and dilates according to the ambient lighting. But instead of trying to make Shape Keys from the mesh, we’ll do it by UV Map!
Step 1: Add two UV Maps to the mesh.
The first thing we’ll need is to add two UV maps to the mesh that will be special for the deformation.
- With the Plane mesh selected, click the Object Data tab in the Properties area.
- In the list of the UV Maps field, add two new UV Maps. They are added as copies of the active UV Map.
- For better project clarity, we write the names of each UV Map.
With a UV Map for dilated pupil and another for contracted, we’ll deform the UV Maps in the UV Editor.
Step 2: Deform the two UV Maps.
We’ll edit the “Dilated Pupil” to live up to the UV Map name.
- Click on the icon that chooses the Active Render of the “Dilated Pupil” to view the UV Map that will be edited.
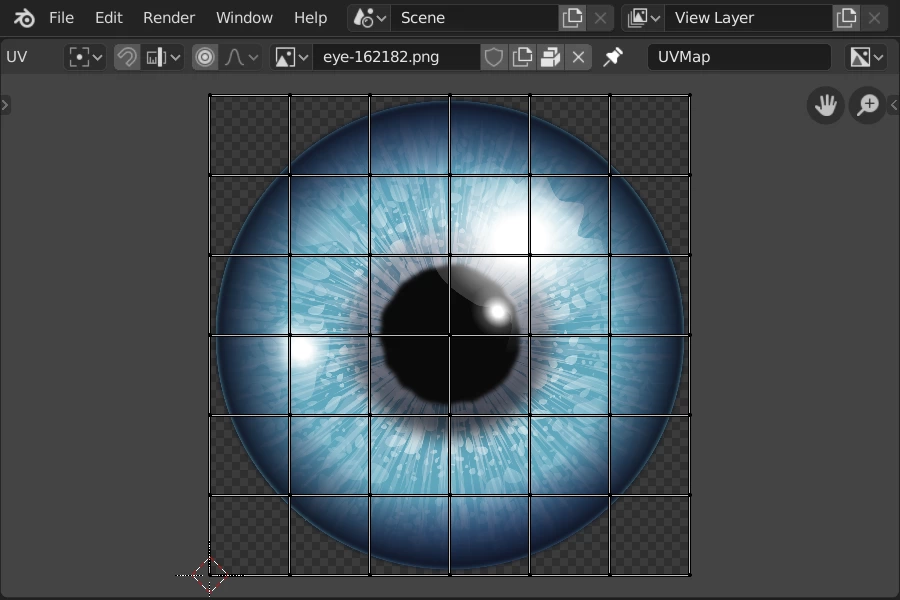
- Go to the UV Editor and enable Proportional Editing and choose Inverse-Square.
- Select all vertices in the viewport.
- Choose the “Dilated Pupil” in the Active UV field, located at the end of the top bar of the UV Editor.
- Select the central point of the UV and decrease the scale by pressing S, and you see the enlarged eye.
Now we are going to do the same with the next UV Map “Contracted Pupil”.
- Choose the Active Render of the “Contracted Pupil”.
- Go to the UV Editor and choose the “Contracted Pupil” in the Active UV field.
- Change the type of Proportional Editing to Sharp.
- Select all vertices in the viewport.
- Select the central point of the UV and decrease the scale by pressing S.
Step 3: Edit the Shade Node.
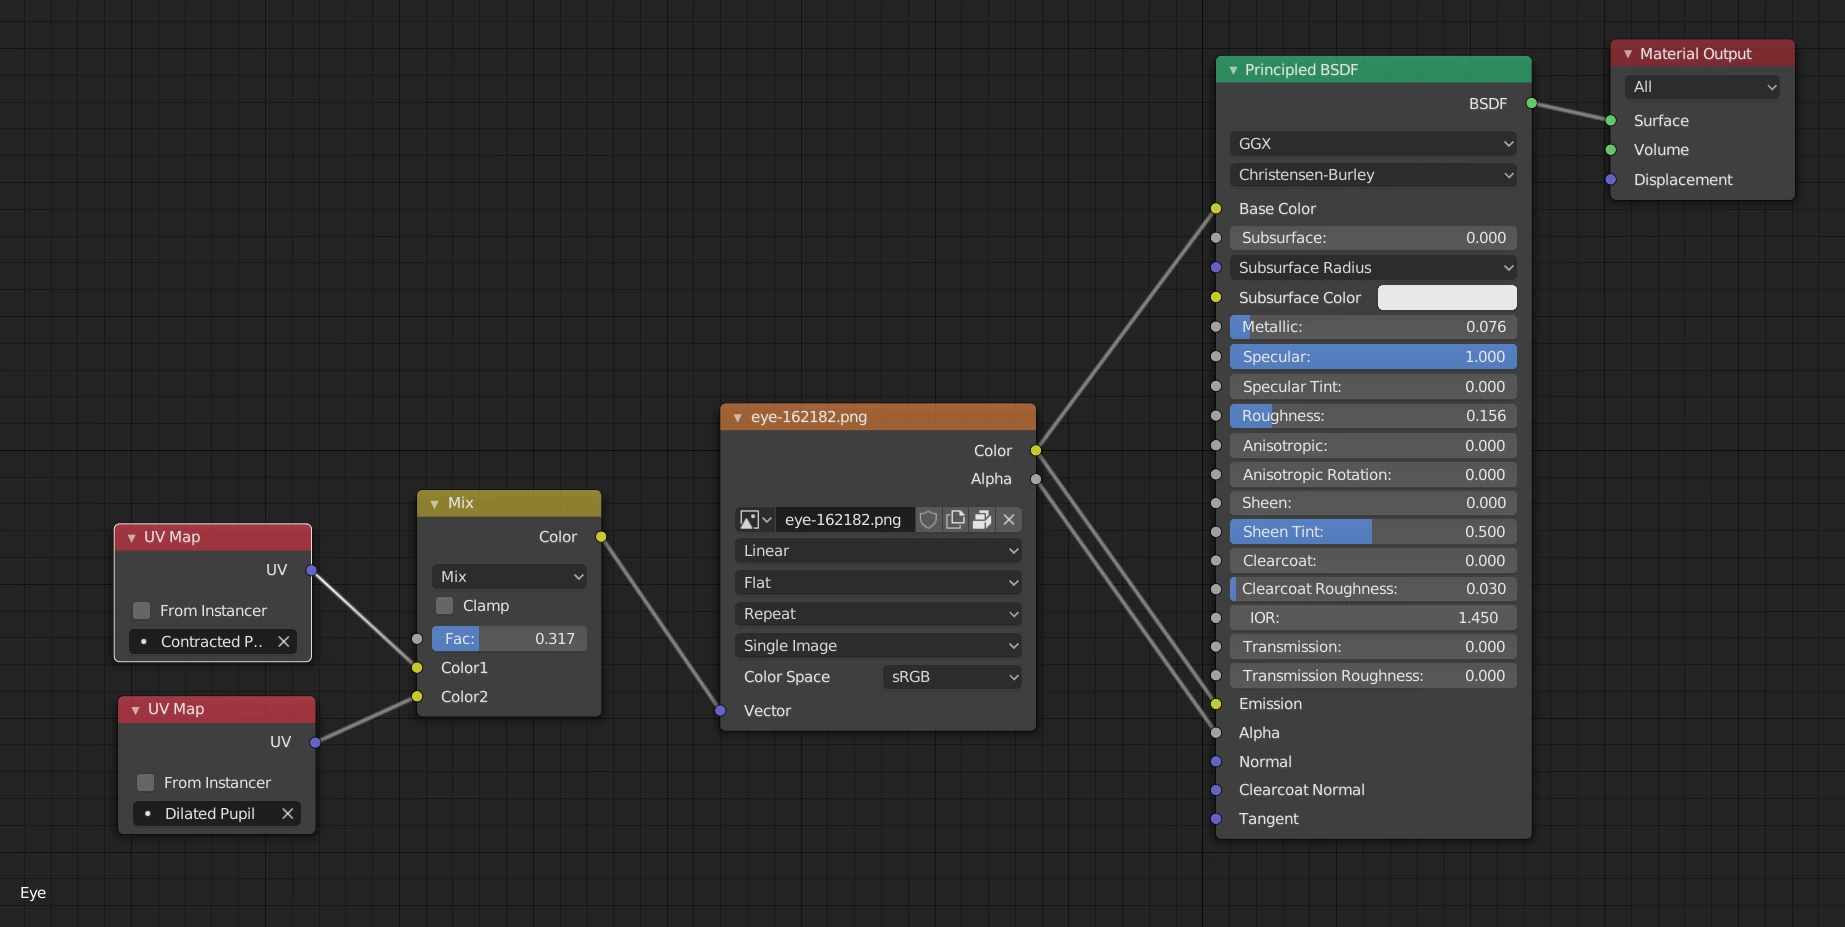
Here is the main and simple step to understand. All you’ll need is just two UV Map nodes and one RGB Mix node in the Shader Editor. That already kills the charade!
In this project the mesh is already with the texture node connected to the inputs of the Principled BSDF.
Now let’s edit the nodes.
- Pressing Shift + A, add the Mix RGB node located in Color.
- Connect the Color of the Mix RGB node to the Vector of the Texture node.
- Add the UV Map node located in Input.
- Duplicate this node.
- Choose “Contracted Pupil” for one UV Map node and “Dilated Pupil” for the other.
- Connect the UV of each node to Color 1 and Color 2 of the RGB Mix.
It is only then to adjust the Fac values of the Mix RGB to fade between the created UV Maps and see the result in the viewport.
Extra step: Insert keyframes.
Let’s add keyframes to the Mix RGB’s Fac property.
- Right-click the Fac property.
- Click Insert Keyframe.
Or…
- Point your mouse at the Fac and press I once immediately adds a keyframe.
Check the full node!
Finishing
With this tip, you can use Mix RGB in UV Maps for different applications, use them with Blender Drivers and even complement your Shader node structure.
We are not going to rush in and consider this guide as the definitive solution for any UV Map animation. This is actually a new option that can meet your needs in Blender.
And finally, check the guide result:
What did you think of this guide? Post your opinion in the comments and share to help your friends with this tip!
Thanks for reading! Till next time!
😄
